-
Pathfinder City of Perfect Strangers Part 1 Post-Mortem: Crushin’ Lads and Rats
YO NERDS,
This post is literally 2 months overdue, but since my condo
I hope to all the gods in the heavenswill hopefully be ready in a few weeks, I think it’s about time to summarize the events that have transpired.Overall, this post is going to be pretty brief, since the module’s kind of gear-deficient starting out.
Firstly, here were the big complaints I got:
– The personal quests, while kind of cool, dragged on for non-participants.
– People kind of just assumed stuff during battle and didn’t coordinate, e.g. if someone wants flanking damage, they didn’t coordinate with another to assume position.
The personal quests were kind of a lark to get people seeing more of Kaer Maga and a bit of a test for me to see if I could weave some of the City of Strangers supplement and make new NPCs. They did kind of drag on for non-participants though, so what I’m thinking about doing for the start of the second module (not for the rest of the first part which we’re still on) is actually do a group-wide side quest, like investigating a bounty or a mini-dungeon. I think that’ll give me and you guys a chance to encounter classes we generally don’t go up against or play as.
For the second thing, I’d just say that if you want to do something like flank it’ll be great if you worked in-character and said something like, “HEY SO-AND-SO GET BEHIND THIS LICH AND WE’LL GET THE DROP ON EM'” or something. If you want something in battle, speak up is what I’m saying.
Second, here is the brief summary of the events:
The party had been staying at the Starry Night Inn in Kaer Maga with the Church of Pharasma footing the bill. They receive an invitation from a merchant named Tom Morrow the 3rd (grandson of the clownish zombie Svilennius controlled) asking for help with a minor caravan escort job. In addition, the note had a handwritten sentence from a Captain of the Duskwardens telling the group that they should take the job.
The job was fairly straightforward on the face of things–help the Duskwardens who were undermanned by the turf war in the Oriat district escort the caravan up the Halflight Path–but then the Captain reveals that they need the party for something else. Apparently, a group of people colloquially referred to as the “Shadow Lodge” has been impersonating Pathfinders and buying up a raft of magical items in Kaer Maga and elsewhere. The Duskwardens (among possibly other factions in the city) feel that if these psuedo-Pathfinders get too strong, then it may bring the wrath of real Pathfinders, if not the incensed armies of places like Korvosa, down upon Kaer Maga.
They task the party with going to a merchant named Collgardie’s house, as he was the one who first found out about these fake Pathfinders. On the way back up the Path though, a sophisticated cave-in trap blocks the party in a cavern with a set of goblins and a goblin shaman. The party emerges victorious, and notices that A) the trap is way too clever for goblins, and B) the goblins themselves were carrying potions marked with a strange symbol.
The party makes their way back to town, and after taking care of some side business, decide to visit Collgardie’s house. They find, however, that Collgardie’s been murdered, and a group of goons attack using strange weapons like stingchucks (skulls filled with vermin). After felling a few of the goons, one goon exclaims that the party was the one that murdered Collgardie and after some back and forth banter everyone stands down.
Clearly confused, the goons explain that they were there on the orders of a Besel Ardoc of the Ardoc family, an economically powerful golem merchant in the city who was a personal friend of Collgardie’s. The goons then go on to say that the party should seek out Ardoc.
As they explore the city and talk to the locals, the party finds out a few pieces of information about Ardoc, namely, he likes to drink and he travels with a contingent of powerful iron golems, but this isn’t enough information yet.
Third, the side missions:
– (Eric) Grifflebore Stuzen was contacted by a paladin of the Church of Iomedae in Korvosa to help maintain the secret information lines that the Church uses to keep tabs on things in Kaer Maga. This involved going to the Strapping Lad Social Club and delivering a coded message to a “Miss” Flowers, informing “her” that one of “her” boys revealed crucial information.
When the spy (named Bernard) was cornered by the blonde pig-tailed, pink sundress-wearing clay golem bouncer named Bubbles, the spy escaped via the rooftops. He confronts Grifflebore in an alley and attacks, but gets brutally beat down by Grifflebore’s paladin training and hammer.
The Church of Iomedae receives word about Grifflebore’s actions, and awards him a badge that can help with negotiation (or intimidation).
– (Enoch) Shania Casa was given a letter by an antiquarian in Kaer Maga who needed help identifying a magical stone that was purported to be related to the Pillars of Dream, a mysterious landmark in Kaer Maga that causes people to fall asleep. When Shania fell asleep between the Pillars, she dreamed that she was below Kaer Maga’s surface in a sadistic prison that straps people to chairs and causes them to have visions of horrible things. The object given by the antiquarian was revealed to be part of one of those chairs, knocked loose from the attacking forces of a creature known only as Anamnesis.
As the horrific shambling corpses of the prison helped Shania get free, several undead guards attempted to block the way out of the prison. Shania summoned a pony (!) and rode past them to get free.
Waking up back above ground, Shania goes back to the antiquarian and reveals the true nature of the item. The antiquarian was clearly shaken, but awards Shania a wand of Burning Hands and a tuning fork used for identifying magical items.
– (Jack) Gunnar was contacted by an excitable halfling archer (and amateur fletcher) named Adelard from the Warren district that saw him buy his composite longbow. Adelard needed some help fighting some sort of rat lurking in the sewers that had been vexing the halflings of the district for a while.
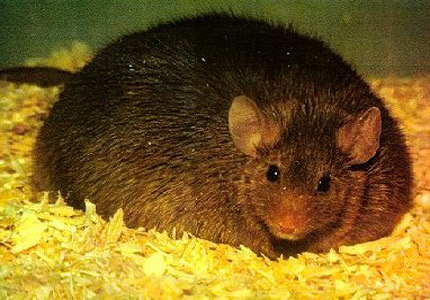
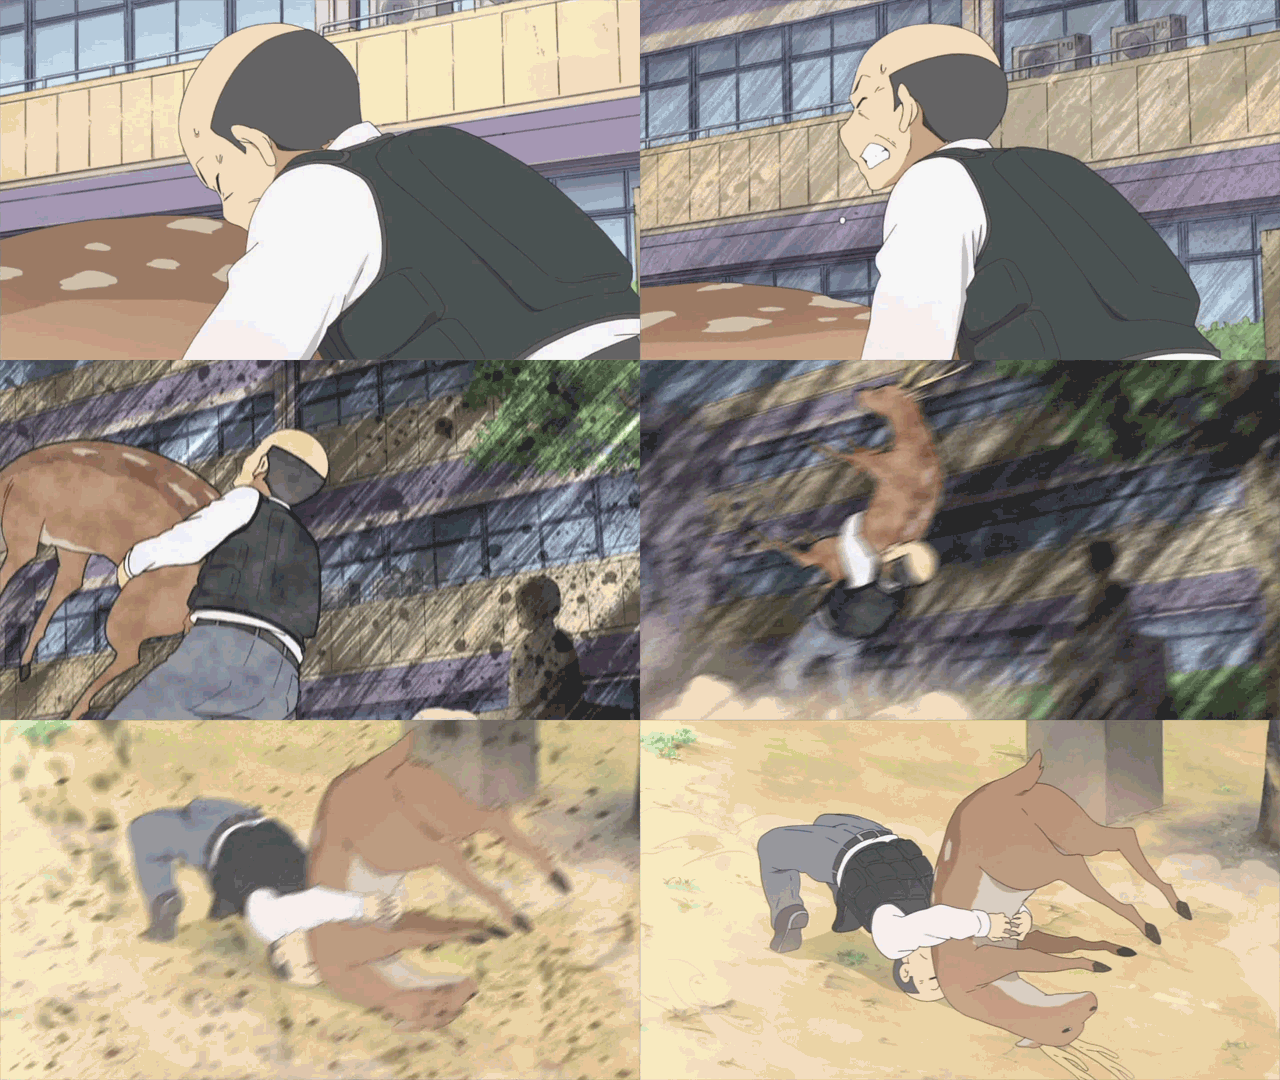
Gunnar accepts, and makes his way to a culvert where the rat had been sighted. He easily defeats a dire rat that had been lurking there, but Adelard surprises him by saying that the rat he killed has ‘only one head.’ A two-headed mutant rat bursts through the culvert wall and attacks. Eschewing his bow, Gunnar brings out his lucerne hammer to face the hideous creature. Drawing upon some hidden well of strength, Gunnar fatally smashes the huge rat into the wall, killing it instantly.
Gunnar goes back to Adelard, who is clearly pleased and impressed that the problem’s been dealt with. Adelard then rewards Gunnar with a quiver full of arrows he had been working on.
– (Steven) Elorin is contacted by the tengu rogues, whom the party had encountered in the Godsmouth Ossuary, who are asking for help retrieving a ledger held by Collgardie. The tengu wanted to give up adventuring after their disastrous time in the Ossuary, so they decided to open a shop. They believed that having Collgardie’s ledger would help them negotiate for better wholesale prices, so they tasked Elorin (who they correct guess to be a thief) with stealing it.
While in Collgardie’s house, Elorin comes upon a strange chest that looks to be the hiding place of the ledger, and finds out that the chest is in fact a Four-Trick-Trap Chest, a chest designed to administer deadly poison to those not intelligent enough to complete its questions. Elorin manages to pass enough of the tests to get the ledger and bring it to the Drinking Crow, a tengu bar.
The tengu are so pleased that they give Elorin a bag of junk they cobbled together, which includeda valuable loupe that hones trapfinding.
– (Bob) Someone from the Church of Sarenrae contacts Valeria to help search for several obsidian artifacts that have been favored by goblins in Kaer Maga. The artifacts seem to be idols relating to the four goblin Hero-Gods, and they seem to grant extra power to the goblins’ foul abilities.
The first artifact seemed to be in the possession of the shaman that ambushed the party in the Halflight Path. Valeria bartered for the second with a creepy old woman in the Ankar-Te district. A pathetic juggling goblin possessed the third artifact and sold it for a pittance to Valeria.
Rumor has it that the fourth was sold to a group of armor-clad goblins not longago.
Fourth, ok so maybe this post isn’t too brief but whatever here’s the loot:
– a raft of Cure Light Wounds potions– a box of fine cigars (unappraised)
– a bottle of Cramshire’s Special Reserve Vintage wine (unappraised)
Recently, denizens of Kaer Maga’s underworld have been made aware of a certain purportedly “Ultimate” guide to equipment, and have started to outfit themselves and their stashes accordingly.
Finally, challenges:
-
Call of Cthulhu – We Need a New King, This One is in Tatters (8/11/12)
This will be a quick rundown of what happened last time in our Tatters of the King campaign. Though the enormous video stream has unfortunately been lost, in a rare moment of foresight I had written down what happened and when as the investigation team moved through London.
The Players:
Enoch P. as David Davis, Crown Prosecutor
Eric S. as Doctor Nikodemus Prosper, German Paleontologist
David K. as Doctor Rowan Legume, Renowned Psychologist
Justin H. as Genevieve “Gigi” Genovese, American Socialite by day and Con-Artist all the time
Kevin A. as Walter Paige, an art student at University College London and amateur actor
Notable People:
Talbot Estus – writer of “Carcosa”, an adaptation of “The King in Yellow” for English audiences; loaned investigators The King in Yellow and Der Wanderer durch den See.
Jean Hewart – an attractive young dilettante, acted in “Carcosa.” Daughter of Lord Hewart, the Lord Chief Justice of England. Befriended by Gigi.
Walter Paige – a handsome but sickly young man who acted in “Carcosa”, he’s an art student at University College London.
Dr. Charles Highsmith – superintendent at St. Agnes’ Asylum for the Deranged in Weobley, Herefordshire. Contacted Dr. Legume with a request for assistance determining whether a rather unusual patient of his, one Mr. Alexander Roby, should be recommended for release.
Alexander Roby – he and his brother, Grahame Roby, are the only surviving members of the Roby family following the brutal murder of their father and sister. Claims to be their murderer, though he was found in another room soon after the murders, which were committed in such a way that Alexander was eliminated as a suspect.
Mark Evans – orderly at the asylum who snuck Roby writing implements in exchange for future favors from the powerful Roby family. Was chastised and ceased.
Price – orderly at the asylum who escorts the investigators around the grounds, to both Roby and Harriwell’s cells.
Lucius Harriwell – fat mental patient in the cell next to Alexander Roby’s. Blamed for the horrible murder of an orderly, Cuthbert Yates.
Cuthbert Yates – orderly murdered about a year earlier. Seemed to be an unprovoked, senseless attack. Enough blood covered the room for two men, and there were two blood types found at the scene, though none of the other staff at St. Agnes’ were wounded in any way following the attack.
Grahame Roby – brother of Alexander, and a prominent merchant banker. In a meeting with Mr. Davis, showed himself to be a blunt and uncompromising man, wholly convinced of his brother’s insanity and willing to make the necessary calls to ensure that Roby remains at St. Agnes’. Suggested David speak with Inspector Stephens if he wished to know more of Alexander.
Dr. Lionel Trollope – the Roby family physician. He was called when the murders happened at the Roby residence. Dr. Trollope was murdered several days after speaking to the investigators. Before he died he sent a letter to the investigators, explaining some of the history of the Roby family and Alexander in particular. In this letter several leads are brought before the investigators.
Detective Inspector Andrew Taylor – investigating Dr. Trollope’s murder. Spoke to David Davis about his recent meeting with the Dcotor. Informed of the strange man which seemed to be shadowing the investigators over the past few days, and suggested the investigators call him again if they saw him.
Vincent Tuck – private detective hired by Grahame Roby to follow his brother, Alexander, for three weeks in November of 1925. Revealed that in November 1925, Alexander met almost nightly with three men: Lawrence Bacon, Malcolm Quarrie, and a fourth man only identified as Edwards.
Lawrence Bacon – Tuck described Bacon as being older in 1925 than he seems today in 1929. The investigators met Bacon at his place of business, an antique and rare book store in London, and spoke to him through the bars on his door (which he did not open to allow the investigators to enter). He requested any business cards the investigators had on them and bid them good day.
Shadowy figure – a man has been tailing the investigators. The description given of this man, along with the description of Dr. Trollope’s murderer, fits the man who knocked out David Davis in a bar and instructed the investigators to stop what they’re doing or “you’re dead.”
The Story Thus Far…
Thursday, November 3rd, 1929 – We open on our investigators stuck indoors as snow continues to blanket London
Friday, November 4th – David Davis schedules an appointment with Inspector Stephens
Saturday, November 5th – Investigators receive news of Dr. Trollope’s murder; David Davis schedules appointment with Detective Inspector Andrew Taylor, the lead detective on the case
Sunday, November 6th – Find whistle, talk to paper boy
Monday, November 7th – Blizzard
Tuesday, November 8th – Meeting with Bacon; meeting with Vincent Tuck; encounter man in bar
-
Pathfinder – City of Perfect Strangers Part 1 (8/18/12)
(PSA: Update your DND Sheets please)
Hopefully you all had fun during our
last-minute attempt to cover my screw-upimpromptu Arkham Horror/Magic: the Gathering draft tournament. Now that that’s out of the way, time to get back to the next Chesapeake Pathfinder game. We’re going to be doing the first of a modified game of the City of
Strangers module, and I say modified mostly because this module is super-vague on a bunch of things, so I have to add in stuff and tweak the story a bit.This module’s less about a dungeon crawl than encounters and a little investigation FYI.
Setup:
The Church of Pharasma, clearly grateful for the services you rendered, has paid the lodging costs for you all to stay in a large suite located in a relatively nicer inn in Kaer Maga called the Starry Night, located at the junction of the Widdershins (the quiet neighborhood of Kaer Maga) and the Hospice (a red light/merchant district). Representatives of the church promise that they may know others who have tasks that require the group’s unique set of skills.
Though a week passes by without incident (or injury) to any of you, there seems something… off about the town. Maybe it’s the increase in hurried glances among Kaer Maga’s strange populace or a general rise in irritation amongst the townsfolk, but it feels like something big is happening under the surface.
In the midst of all this, the innkeeper your group receives a letter on gold-embossed paper while at the inn:

On the back of the envelope is a small drawing of an arch and a bit of handwriting that reads: Accept this job. We need to talk. – Cpt. R. D. Alfonse.In addition to this note, the innkeeper mentions he’s received something addressed to each one of you.
Several reminders:
– Decide on Facebook what to sell from the last time and buy items. It should be pretty easy to see what stuff you guys probably will never use (the masterwork ranseur for instance). On that note:
– You can sell scrolls and potions for the half the cost of the highest class/level combination for the base spell. I have an example of this on Facebook.
– Because Tier 1 City of Strangers (for level 1-2s) has less power behind it than a set of Styrofoam brass knuckles, you guys are going to play on Tier 2 (level 3-4s). I still might do some tweaking and I’m definitely adding in one party encounter that I hope will be at least a little challenging. Stock up on scrolls and potions and tools because I do think some of these encounters are harder.Additions to this module:
– New challenges
– Secret missions for everyone with special rewards
– NPCs/locations using the City of Strangers supplement as a guideline
– Some different encounters
Time Limit: We’ll set this to 5 hours and see how everyone does and if you want to keep going we can go longer.
-
Pathfinder – Legend of the Red Dragon (6/9/2012)
Last time, on Pathfinder:
Gaedran Lamm, remember him? He wronged each of you in some way, so when you received a letter from a woman named Zellara asking to meet about what to do with him, you were introduced to each other. You tracked him down in his hideout, killed him, and learned that Zellara was dead and what you had been speaking to was, in fact, her spirit tied to her Harrow card deck. You also found a locket which belonged, surprisingly enough, to Queen Ileosa of Korvosa. You returned it and received the Queen’s thanks (and a sizeable amount of gold), and were asked if you would aid Field Marshal Cressida Kroft in Citadel Volshyenek. The task: stabilise the city, which was going through a… transitional period after the very recent death of the King.
This you did, and were thus given a job: fetch rogue guard Verik Vancaskerkin from the All the World’s Meat butcher shop, where he’s set up with some other deserters. Along the way your party tangled with some imps, saved a noble from being lynched by a mob, and were pawed at by a grimy doomsayer. You slaughtered an errant guard or two and captured Verik, then brought him back to face the King’s (or I guess now, Queen’s) Justice. Retiring that evening you discovered a drunken guard sergeant named Grau, and dragged him back to the Citadel, to the thanks of Cressida.
The whole ordeal ended with Cressida thanking you for your service, with a promise that she’d let you know when she had another job for you; thankfully the rioting has died down somewhat, and a strained, uneasy peace has fallen upon the streets of the city. In the meantime, she gave you a lead on a friend of hers who had a problem down near Riddleport. Four of you followed up on this, while two stayed behind in Korvosa. This ended up being a case of a missing brother-in-law, a tax collector who had last been seen in the podunk village of Ravenmoor.
We all remember what happened there. There was some … unpleasantness involving a cult and some nightmare shit and a handful of wheat. So… yeah.
You have now returned to Korvosa. After two days of rest (and spending your newly-found wealth; oh yes, lots of spending), the innkeeper stops you on your way out and presents you with a message, sealed with the royal seal of Korvosa. Opening it, you scan the contents: Field Marshal Kroft welcomes you back to Korvosa, and commends you on your excellent performance while simultaneously lamenting the tax-collectors fate. She then requests your presence that afternoon, telling you there is an urgent matter which requires your attention.
So begins another eventful day in Korvosa…
-
The conclusion of the Cult (Nirmathas Campaign)
In case you forgot how the game even started, read the previous post.
Event Information:
READ THIS FIRST! I wrote up what happened in the last two games below but before you start, it is extremely important that you read this part of the post.
Game start time: 2:00 PM – 2:30 PM
Dinner Break: 5:00 PM – 7:00 PM
Game end time: 9:30 PMPlease note that I will begin wrapping up the adventure at 9:00 PM. I recommend everybody to show up before 2 PM as that is the only time I will allow everybody to shop. After 2PM comes around, I will be closing all the shops and you will not be able to buy anything at all afterwards. I recommend that everybody reads what their characters are capable of. If you have the time, try to read what your class does and re-familiarize with the rules.
The Story so far:
After the meeting with Reginar, the adventurers finally decided to take action and investigate the temple in order to find hard evidence of the cult’s criminal activities. They started this plan after midnight. From there, they explored the basement and parts of the first floor. They ran into some resistances along the way but it was nothing that they couldn’t handle. From a hungry Krant stealing food to a trap door that led them to a poisonous snake, there was nothing that could stand in their way. Eventually, they arrived to the stairs that would lead them up to the second floor. Unfortunately, by climbing up the steps, the cultists guarding the stairs activated an audible alarm that alerted the entire temple. Fortunately for the adventurers, the cultists were afraid of climbing upstairs due to the fact that only high ranking officials were allowed. Unfortunately, the party was separated into two groups with two members being stuck on the first floor and the rest of the party stuck on the second floor.Kala had enough inaction and decided to take things into her own hands. She proceeded to jump down from the second floor, surprising the group below and the party members above. The battle was fierce and would have been swift if it weren’t for the sudden arrival of Egarthis and his hell hounds. It was a very close battle as two party members fell unconscious in the brawl. Kala was almost gone for good but, thanks to her strong will and the adventurers, she managed to survive. As soon as Egarthis fell in battle, the party made a hasty retreat upstairs to Iramine’s quarters and grabbed all the evidence and loot. While they were in her room, they found a strange note that read:
Now that I have the completed amulet, I shall return to the City of Golden Death to finish what was started all those years ago. At the time, I thought Kassen was a fool for insisting that we abandon such wealth but now I must thank him. The treasure shall enrich the Living God, so that he will never die. Such is the price of immortality. Now I must return to the Isle of Terror and I cannot say that my journey will be without terrible danger. May Razmir protect me.
They escaped the temple by using the secret underground passageway. From there, they met up with Razmir at the Forest Bounty. As soon as they delivered evidence of the temple’s foul deeds to Reginar, he immediately stormed off to speak with his contacts. Within hours, Forest Marshal Gavrik has the Razmir faith outlawed in all of Tamran as a garrison of rangers moves in on the temple to arrest the remaining cultists. Later in that evening, the garrison pulls down the entire building and put it to the torch. With the Razmir threat eliminated from Tamran, Reginar meets up with the party moments later and congratulates everybody on a job well done. While Reginar’s job is over, he hopes the adventurers will plan on chasing after the leader of the cult so that they can put an end to this menace once and for all as Tamran and Nirmathas will never be the same unless this threat is dealt with.
Important Characters:
Ekat Kassen – Famous crusader and fortune seeker. The founder of the town of Kassen. Used to be allied with Asar and Iramine until they split off after acquiring a great deal of treasure from an ancient treasure vault. He used to have an amulet that matched with three other amulet pieces that would open the vault. Died after Asar mortally wounded him in battle.Asar Vergas – An old companion of Ekat who went his separate ways after splitting the treasure acquired from the ancient treasure vault. Was killed by Ekat after Asar tried to raid the town of Kassen but not before mortally wounding Ekat. Used to have the 2nd amulet piece that opened the way to the treasure vault.
Iramine – The elven maiden who used to be companions with Asar Vergas and Ekat Kassen before they split up. She is now the leader of the Razmir cult in Tamran. She has sailed away from Tamran in search of the City of Death in order to reclaim her treasure in the name of the Living God.
Cygar Anravis – Mysterious member of the Pathfinder society who tries to find adventurers worthy enough to join his cause. He sends the party off to Tamran.
Captain Welren – Captain of the Black Mist. Loves fishes.
Reginar Lacklan – The pathfinder associate who resides in Tamran. Gives the group vital information regarding the cult of Razmir and gives them a quest to find any incriminating evidence against the cult.
The Cult of Razmir – The faithful who worships the living god, Razmir. They aim to corrupt the people and the government of Tamran and to increase the power of Razmir. As of right now, the cult has been disbanded in Tamran.
Egarthis – The current leader of the temple and the first high ranking leader the party members meet. Responsible for overseeing the ceremonies. The party kills him in an epic final battle at the temple.
Krant – A brutish priest who is second in command. He is responsible for overseeing the group and making sure they complete their tasks effectively. He also enjoys a little bloodsport as he forces the group to fight amongst each other. Status: Owned and dead.
Evlar – A homeless acolyte who joins the cult at the same time the party does. His father beats him. The party ends up killing him when he took party in the final battle at the temple.
Krox – transcended time and space in order to have lunch with Judgement Dave in Norrath.
-
Pathfinder Godsmouth Heresy Post-Mortem: Package of Double Stuf Oreos Takes 10d10 Damage
Hi everyone,
Great job on completing the Godsmouth Ossuary! I hope everyone had a good time despite the loooooooong length.
First:
These were the main complaints I got:
– Monsters were a bit too easy
– Length
I’ll work on both of those for the next module. Next time we’ll put 5-6 hours as a cutoff point. Another complaint was that people kinda spent a lot of time acting OOC and getting tied in knots on combat/exploration decisions which is fine up to a point, but it tied into the length complaint.
People really liked the challenges and not the spot XP system (get a stone for every passed skill check) so much, so I’ll definitely continue the former and discontinue the latter.
Second:
Here is the full list of stuff you guys found sans pure treasure/gold items (blue means it was magic, the unidentified forms are in red):
– cloak of resistance +1 (a silky, grey cloak)
– phylactery of faithfulness (an odd leather headband with a tiny wooden box inset in the middle)
– bracers of armor +1 (iron bracers curiously free of rust)
– Sihedron medallion (a seven-pointed star medallion)
– set of masterwork banded mail
– masterwork bastard sword
– 2 curved daggers
– stone tablet of Identify (a tablet that reads EVAD TNEMGDUJ)
– stone tablet of Hold Portal (a tablet that reads DLEIFRAG)
– stone tablet of Remove Disease (a tablet that reads AKUSA)
– stone tablet of Shatter (a tablet that reads GOOBLE GOBBLE)
– 2 scrolls of Delay Poison (a scroll that reads EM DAER)– feather token (feather) (a green feather)
– feather token (whip) (a red feather)
– scroll of Remove Paralysis (scroll of FOOBIE BLETCH)
– bag of tarnished silver powder (worth 1 GP)
– a potion of love (a pink potion that tastes like strawberries and cream)
– a potion of Eagle’s Splendor (a clear, brown potion with white specks that tastes like old licorice)
– masterwork ranseur
– half-plate armor inscribed with the Rune of Wrath (cosmetic)
– 2 potions of Hide from Undead (a milky potion that tastes of chalk)
– wand of Disrupt Undead (a wand made of segmented animal bones)
– 2 potions of Cure Light Wounds (clear green potion that tastes like lime)
– 2 potions of Enlarge Person (dark red potion that has a slight fishy taste)
– wand of Command Undead (wand made of black iron)
– 1 flask of acid
– 2 flasks of alchemist’s fire
– 2 smokesticks
– 1 tanglefoot bag
– 1 thunderstone
– a set of masterwork studded leather
– a +1 spear
– an alchemist’s kit
– a set of masterwork embalming tools
– an alchemist’s formula book
– thieves’ tools
– a scroll of Ghoul Touch (a scroll of SALADBWL)
– a scroll of Mage Armor (a scroll of GUFF)Third:
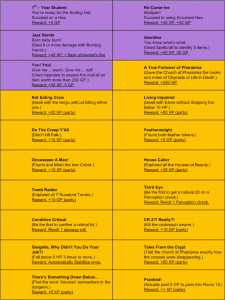
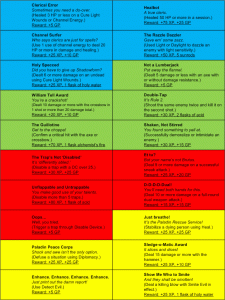
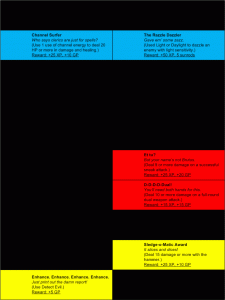
Here are the full lists of challenges:
Like I said, people liked these a lot, so I’ll definitely make more next module… and I just realized that I missed a golden opportunity to have a skeleton-centric challenge called ‘Charnel Knowledge.’ Dammit!
Fourth:
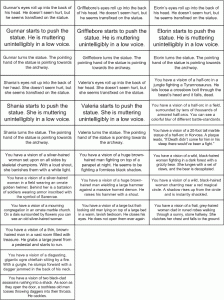
Here are the Pharasma encounter cards. Initially, the one statue in the Cathedral was only supposed to give you an Aid spell, but I thought that was kind of boring so I changed it into more of a meeting with Pharasma to add drama to the Esme encounter.
Fifth:
Rather than a synopsis of the entire module, because that would take a while to write, here’s a list of the encounters you had instead:
Encounter 11: 4 skeleton archers
Encounter 12: 3 crawling hands
Encounter 13: brown mold
Encounter 14: Erdikhaan (skeletal champion of Wrath)
Encounter 15: lemure
Encounter 16: 2 ghouls
Encounter 17: bloody skeleton
Encounter 18: 2 tengus (negotiated)
Encounter 19: lustspawn
Encounter 20: gasburst zombie
Encounter 21: alchemical skeleton and alchemical zombie
Encounter 22: Svilennius Tripe, Mr. Morrow, vat zombie
Encounter 23: Esme and her 2 skeletal handmaidens (Lulu and Fiona)
Encounter 24: 4 alchemical skeletons
Finally:
Please update your DNDsheets. I’d like to see what new stuff you get and it helps me make challenges. See you all next time!
-
Pathfinder Part 2: I’m Attacking the Dorkness (4/21/12)
Alright, it’s been a while everyone, but now with our respective craziness out of the way, it’s time to finish up The Godsmouth Ossuary.
On my end, I just want to say I had a really good time the last time DM’ing, and everyone seemed to be really on the ball and enjoying themselves too, which was great. We got through a lot of encounters and secret stuff in a relatively short (for us) amount of time. Hopefully everyone will have an even better time this time, and to that end I’m trying to spice things up by making more fanciful room descriptions, think of combat descriptions, etc.
We’re going to try to start at 5:30 and hopefully not go later than 11 or 12. Let’s try to aim for a break between 8:30 – 9. I don’t have much else to say, so here’s a rundown of some other stuff.
Firstly, here are the challenges you’ve all completed so far. I got a lot of positive feedback from them, and I’m going to make some new ones for (hopefully) the last session in this particular part of the Ossuary. I have to think of more bad puns though! (Click to embiggenate):
Second, here is a down and dirty summary of the encounters and things that happened so far. I’ll go over what way you guys went when you get here:
Intro:
– Contracted with Church of Pharasma to find out what happened to missing bodies
– Went into the upper portion of the Godsmouth Ossuary that is normally not open to visitors (this is where bodies are interred for a high price)
– Church official gives you a Chime of Opening with 5 charges, along with a flask of holy water, a potion of cure light wounds, and adventuring supplies
– She mentions that you need to save a charge for the way back, since the church has no way of knowing what happened to you if you knock on the doorGame proper:
– Went down stairs, reached a chamber with 3 Pharasma-symbol doors
– ENCOUNTER 1: Darkmantle
– Went through the middle door using 1 charge of the Chime, into a corridor of alcoves
– ENCOUNTER 2: 4 skull spiders
– Went through door and onto a bridge overlooking a large chamber
– Saw various statues, 7 white and 1 black
– Went through door at end of bridge
– Go to a crossroads, heard a thumping noise from the east and determined it was an undead vargouille (floating head)
– ENCOUNTER 3: Undead vargouille
– Explored the room with the vargouille, then opened door to next room, whereupon the room went dark
– Determined with darkvision that the culprit was a dark creeper
– Managed to calm it down enough to realize that it was trapped in here by something in the room over and by the vargouille. The creeper leaves, leaving behind treasure for the party
– Leaving the next room (guarded by something snake-like according to Falk), the party goes back to the crossroads and heads down the other corridor going west
– Party finds two rooms facing each other that emanate a strong magical aura. When a pebble is tossed into one room, it comes back into the other.
– Party finds another crossroads and heads south.
– Party heads down corridor, finds a suit of armor and a skeleton. As the party gets close to the armor, a swarm of living cockroaches shoots out
– ENCOUNTER 4: Cockroach swarm
– Party heads back to the crossroads after the fight, enters a locked door nearby.
– Party enters a library filled with stone tablets. As they look up at the various runes, a rune detaches and flies towards them
– ENCOUNTER 5: Rune guardian
– Party closes the door and rests. However, something manages to find them.
– ENCOUNTER 6: Festrog
– The group heads back down to Falk’s room and opens the other door. They encounter a goblin snake creature named Yrix who offers to explain parts of the Ossuary. It’s evident Yrix is a liar and knows some about Godsmouth, but it’s not an expert. The party pays to pass into the next room.
– The next room has a staircase leading down, but it’s impassable.
– Gunnar flips the table over, causing Yrix to attack.
– ENCOUNTER 7: Yrix
– Party heads back west, and at the crossroads heads north.
– Party reaches another T-shaped crossroads, and heads west to the blocked Sihedron door.
– Party goes east to the Great Pit. As they split up and travel around the pit, something from down below comes out to attack.
– ENCOUNTER 8: Necrophidus
– Elorin detects a draft coming from the wall, and it’s a secret room. The room is small and has a sarcophagus, but also a guardian.
– ENCOUNTER 9: Iron cobra
– Opening the sarcophagus, the party finds an extremely well-preserved corpse being kept preserved (presumably) by the Sihedron medallion around his neck
– The party continues to head east into a foul kennel area.
– ENCOUNTER 10: 2 (3?) Festrogs
– Gunnar touches the menhir in the middle of the kennel, and is transported for a moment to the Dark Forest, whereupon he sees an Otyugh grappling with a dinosaur, a headless horseman on top a spire, and lights in the forest.
– End.Third, here is a list of the treasure you’ve found so far:
– adventuring accoutrements from the intro (holy water, cure light wounds potion, backpack, bedroll, trail rations, waterskin)
– cloak of resistance +1
– three freshwater pearls (10 GP a piece, known)
– engraved ivory bracelet (24 GP, appraised)
– 51 GP in total (24 from Yrix’s hoard, 27 from Falk’s)
– 32 SP in total
– phylactery of faithfulness
– a gold chalice (*Pharasman artifact)
– a gold bowl (*Pharasman artifact)
– 2 gold plates (*Pharasman artifact)
– a large gold holy symbol of Pharasma (*Pharasman artifact)
– bracers of armor +1
– Sihedron medallion (Special item: grants +1 resistance bonus on all saving throws, can use false life 1/day, can bestow gentle repose on a corpse)
– set of masterwork banded mail
– masterwork bastard sword
– 2 curved daggers
– stone tablet of identify
– stone tablet of hold portal
– stone tablet of remove disease
– stone tablet of shatter
– 2 scrolls of delay poison -
Pathfinder: Take Me Down to the Ossuary, Where the Mold is Green and the Bones are Gritty
Ok, there’s one week left until the first Chesapeake Pathfinder game. I’ve been going over the rules, getting nickel and dimed on miniatures, and starting to formulate flavor text. Everything’s going pretty good but I have some house rule clarifications. Nothing major though, I actually think these will make things easier.
Please make your sheet on DNDsheets so I can look it over and make challenges for you.
Players:
– Bob: Valeria, Aasimar Cleric
– Jack: Gunnar Halftroll, Half-Orc Hunter
– Steven: Elorin Hawklight, Human Rogue
– Eric: Grifflebore Stuzen, Human Paladin
– Enoch: Shania Casa , Changeling Witch
House Rules:
– Identifying scrolls and potions – I’m going to use what I call ‘Nethack rules’ on these. You’ll find a potion with a different color/taste/smell or a scroll with an inscription of <RANDOM NONSENSE WORD OR PHRASE>, and once you identify it (using the normal methods) as a scroll of, say, cure light wounds, then any further scrolls of cure light wounds (even ones with +X enchantments) will be automatically identified.
It won’t tell you whether something’s cursed though, so watch out. This isn’t much of an issue in this dungeon though.
– Divine vs. Arcane scrolls – There’s a rule in the book that in order to read a scroll without a check, you need to fulfill these criteria:
1. You have to be the correct type of caster (Arcane or Divine) corresponding to the scroll.
2. You have to have the spell on your class list.
3. You have to have the minimum ability score.
4. You have to be at the minimum caster level for the spell (or else you make some easy check like DC = caster level needed + 1)/
I’m going to discard rule 1. There’s really one room in this dungeon where they specify one scroll as being divine and one as arcane, but none of the other scrolls in the entire dungeon are identified as such. Rather than label some scrolls as arcane, some as divine, and some as both, all scrolls are going to be arcane/divine.
– Announcing Checks/Looting a Room – Pretty much I’ll give you most of the checks except for Perception in most cases. If you want to search the room for treasure, you’ll have to say you want to search it and I’ll probably have you roll a Perception check.
-
Pathfinder: Rolling Bones for Pharasma
Alright dorklords, here comes the first ever Chesapeake Team Butts Pathfinder game! It’s planned for 1/28/12 at 5:30ish. We’re pretty much well-versed in how Pathfinder goes down already (say we’ll start at 1 PM, start at 5 PM, turn into a scene from 12 Angry Men when it comes time to decide where to eat, etc.), but this game’s going to be a bit different. In an effort to be less work
for the DMfor the players, we’re going to have slightly different rules. First off though:Here is the module I’ll be running. It’s a well-regarded 1st-level module. Here’s the description:
“The priests of Pharasma in the strange city of Kaer Maga have long sold plots in their ossuary to those rich enough to afford them – a place of honor and stature for one’s bones to lie after death. Yet now, this mausoleum has become full, and it is time to break into a new and unexplored wing of the dungeons under Kaer Maga to create more room. To a band of fledgling heroes, eager to make names for themselves, this represents a singular opportunity – a chance to explore a heretofore sealed section of the Godsmouth Ossuary and perhaps make a fair amount of gold on the side. The only catch is that they’ll need to survive what strange and ancient mysteries lie within! An urban and dungeon adventure for 1st-level characters.”
So polish up on your boner puns dammit.
The Players:
These are the people I have signed up as definite so far:
Bob – Asaarnian cleric
Enoch – Changeling summoner
Steven – Leaning towards magus
Eric – Some sort of tank
Jack – Half-orc ranger
Rules: (more may be forthcoming)
1. Regarding Class/Race/Archetype – You can be any race/class/archetype from any of the Paizo-published books. No third party stuff. Now you can be that Tengu Druid you always wanted to be but if you pick Kitsune I swear to all the Gods in the Heavens that I will bring all my anime Ore wa baka neko yamate yo onii-chan Japanese down upon your head and play the Revolutionary Girl Utena soundtrack whenever you move. Nobody wants that.2. Regarding Alignment – Your alignment has to be above chaotic neutral. This is a conscious effort to promote
less waffling on the DM’s part if you decide your character’s just going to start icing quest-givers and orphansbetter synergy and roleplaying amongst the group.
3. Regarding stats – You get 75 points divvied up through the 6 stats. Minimum stat must be 8, no more than 2 stats at 18. This is before racials. This puts us at the ‘Standard Fantasy’ level. When we’ve played at 85 points pre-racial we’ve noticed that our Kroxes cause monsters to burst like they’ve been hit with a cannon, our spellcasters are basically Arks of the Covenant in robes, and watching our gunslingers fight is like watching the Zapruder film: Lord of the Rings edition. Our bards remained comically inept.
4. Regarding the first level – You get 1 extra skill rank or 1 max HP at first level.
5. Regarding backstories – A backstory would be appreciated, no matter how short. At the very minimum, you have to have a reason why you’re in Kaer Maga and agreeing to do a job like this in the first place.
6. Regarding traits – To compensate for the lower stats, I’ll be allowing two traits at start. Try to work them into your backstory (it’s generally pretty easy).
7. Regarding cards/skill spreadsheets – Not required but they are very useful and they help speed things along. At least bookmark or keep track of your skills in your books or smartphones.
8. Regarding buying stuff – Kaer Maga’s a pretty anarchic city and close to Korvosa, so you can buy what you want for starting gear with your starting wealth.
9. Regarding carrying capacity – Adding up weight and shit and calculating encumbrance detriments is a lot of work. I get that. So to make things smoother I’ll say this: For our purposes our rule is going to be (within reason) use the speed given by your armor stats, but as long as all your junk doesn’t take you over the max med. load, assume no encumbrance detriments. That sounds like a weird rule, but again, since we’re playing with lower stats than normal I’ll allow it.
10. Regarding character sheets – Make one on DNDsheets and send the link to me beforehand if you would. I might tinker with and add bonus checks/spot checks/rooms etc. if there are some checks that people have that the module doesn’t use. (I probably won’t subtract checks.)Also, if you have a snack/drink/liquor/beer preference, send a shout out and I can get some.
-
Gettin’ Hasty with Hastur: Tatters of the King part 1
The Players:
Enoch P. as David Davis, Crown Prosecutor
Eric S. as Doctor Nikodemus Prosper, German Paleontologist
David K. as Doctor Rowan Legume, Renowned Psychologist
Justin H. as Genevieve “Gigi” Genovese, American Socialite by day and Con-Artist all the timeNotable People:
Talbot Estus – writer of “Carcosa”, an adaptation of “The King in Yellow” for English audiences; loaned investigators The King in Yellow and Der Wanderer durch den See.
Jean Hewart – an attractive young dilettante, acted in “Carcosa.” Daughter of Lord Hewart, the Lord Chief Justice of England. Befriended by Gigi.
Walter Paige – a handsome but sickly young man who acted in “Carcosa”, he’s an art student at University College London.
Dr. Charles Highsmith – superintendent at St. Agnes’ Asylum for the Deranged in Weobley, Herefordshire. Contacted Dr. Legume with a request for assistance determining whether a rather unusual patient of his, one Mr. Alexander Roby, should be recommended for release.
Alexander Roby – he and his brother, Grahame Roby, are the only surviving members of the Roby family following the brutal murder of their father and sister. Claims to be their murderer, though he was found in another room soon after the murders, which were committed in such a way that Alexander was eliminated as a suspect.
Mark Evans – orderly at the asylum who snuck Roby writing implements in exchange for future favors from the powerful Roby family. Was chastised and ceased.
Price – orderly at the asylum who escorts the investigators around the grounds, to both Roby and Harriwell’s cells.
Lucius Harriwell – fat mental patient in the cell next to Alexander Roby’s. Blamed for the horrible murder of an orderly, Cuthbert Yates.
Cuthbert Yates – orderly murdered about a year earlier. Seemed to be an unprovoked, senseless attack. Enough blood covered the room for two men, and there were two blood types found at the scene, though none of the other staff at St. Agnes’ were wounded in any way following the attack.
Grahame Roby – brother of Alexander, and a prominent merchant banker. In a meeting with Mr. Davis, showed himself to be a blunt and uncompromising man, wholly convinced of his brother’s insanity and willing to make the necessary calls to ensure that Roby remains at St. Agnes’. Suggested David speak with Inspector Stephens if he wished to know more of Alexander.The Story Thus Far…
